Estimated reading time: 20 minutes

Aria Automation Orchestrator, formerly known as vCenter Orchestrator (vCO) or vRealize Orchestrator (vRO), is an invaluable tool for automation professionals and enthusiasts alike. With nearly 300 pre-built workflows available at the time of writing, it offers a robust foundation for automating a wide range of tasks. While each environment may have unique requirements, these ready-made workflows can expedite the automation process and serve as a starting point for customization.
In my automation journey, my team has primarily relied on Action Based Extensibility (ABX) to execute workflow functions. ABX is a valuable tool, but it has its limitations and may not be the ideal solution for every use case. It’s akin to the old metaphor that not every problem is a nail when all you have is a hammer. By incorporating Aria Automation Orchestrator into our toolkit, we’ve embraced a more versatile approach. We continue to utilize ABX where it excels while seamlessly transitioning to Orchestrator to leverage its unique capabilities when needed.
Recently, my team made the decision to invest time and effort into Orchestrator. Like many others, we faced the common and seemingly simple question of where to begin. Fortunately, we had the opportunity to consult with a wonderful VMware Cloud Solutions Architect who, being an avid blogger himself, provided valuable guidance. Through discussions about our objectives and challenges, we arrived at a straightforward approach for our initial steps.
One of our first priorities was to provide a “script host” that would act as a intermediary between Orchestrator and the rest of our environment for specific tasks. Although we found several informative blog posts through a quick web search to help us get started, we encountered a snag. Our objective was to secure communication between Orchestrator and the script host using HTTPS and Kerberos authentication. Unfortunately, many of the available resources were outdated, no longer applicable to modern software and operating system versions, or contained broken links. This presented a significant obstacle at the time, as the complexity of our endeavor started to expand before our eyes.
After a few hours of good old-fashioned trial and error, research, and debugging, we achieved our goal and successfully established a secure connection between the Orchestrator appliance and our script host. The satisfaction of overcoming this technical challenge is a familiar feeling for many in our field – I know you can relate. It’s the reason this blog exists – to share knowledge, inspire, and celebrate victories, not only within our team but also with you, your organization, and the wider community.
As is often the case in the world of automation, there are frequently multiple paths to reach the desired outcome. Feel free to employ your preferred techniques for certain steps, especially if you need to navigate around specific security constraints. The instructions provided here are intended as a flexible framework and should be adapted to align with the unique requirements and security policies of your specific environment.
So, take a moment to stretch or grab a cup of coffee, and let’s get started!
Before you begin
This article assumes the following:
- The Orchestrator virtual appliance is deployed and configured to the point that the web GUI is accessible, and the user has sufficient permissions to configure the appliance.
- A Windows Server has been deployed for use as a script host.
- The user has adequate permissions to fully manage the Windows server (i.e., add/modify/remove files, local security group members, software applications, etc.).
- The user has access to the Certificate Services portal (or similar internal Certificate Authority), with adequate permissions to generate an internal certificate.
- The user has the appropriate software and permissions to open VMware Remote Console (VMRC) or Remote Desktop Protocol (RDP) and Secure Shell (SSH) sessions to Windows and Linux endpoints.
- The OpenSSL package is already installed on a Linux endpoint and the user has appropriate permissions to use the system, including upload/download files using a Secure Copy Protocol (SCP) client.
Configuration
- Launch the VMware Remote Console (VMRC) or a Remote Desktop Protocol (RDP) session to the script host.
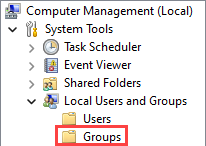
- Right-click on the Start button, then click on the “Run” menu item. Inside the “Run” box, type “compmgmt.msc” without quotes, then press the Enter key. Accept the User Account Control (UAC) prompt as needed for elevation.
- Click on the chevron (“>”) button to expand the “Local Users and Groups” menu item, then click on the “Groups” directory.
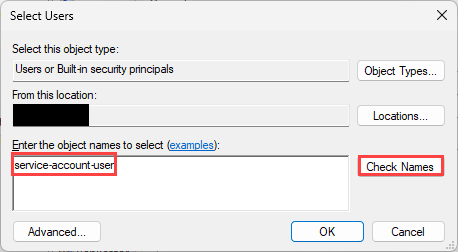
- Double-click on the “Administrators” group, then click on the “Add” button.
- Type the name of the service account you intend to use with the script host, then click on the “Check Names” button. Once the lookup is complete, click on the “Ok” button.
- Repeat the same steps for the “Remote Management Users” group.
- Enable Windows Remote Management (WinRM) dependancies via the Local Group Policy Editor:
- Right-click on the Start button, then click on the “Run” menu item. Inside the “Run” box, type “gpedit.msc” without quotes, then press the Enter key. Accept the User Account Control (UAC) prompt as needed for elevation.
- Expand the menu items located in the left-side pane and navigate to: Computer Configuration > Administrative Templates > Windows Components > Windows Remote Management > WinRM Service.

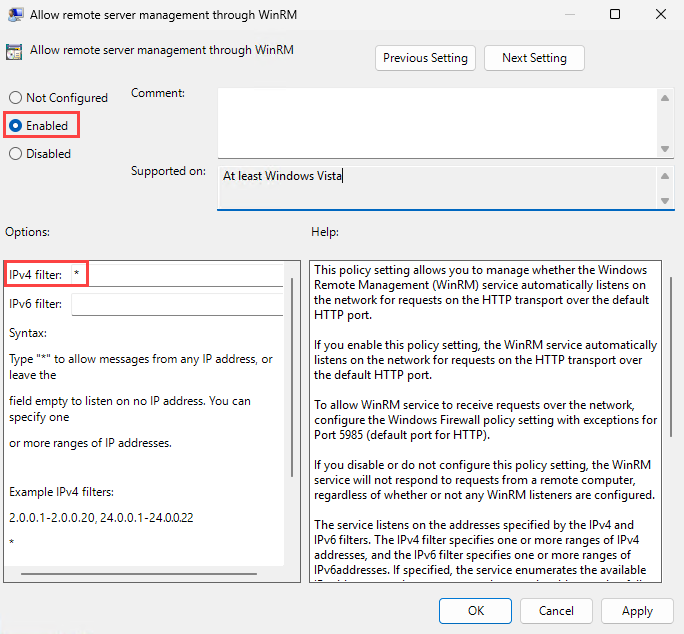
- Double-click on the “Allow remote server management through WinRM” group policy object, tick the “Enabled” radio button, type an asterisk (“*”) inside the “IPv4 filter” text box, then click on the “Ok” button. Note that leaving an asterisk inside the “IPv4 Filter” field will allow all IPv4 connections to the WinRM service. This is acceptable in a lab environment, but is not considered secure, especially for Production-class environments. It is recommended to revisit this screen later to “tighten” security by ensuring that only trusted endpoints designed to communicate with this server are permitted.
- Expand the menu items located in the left-side pane and navigate to: Computer Configuration > Administrative Templates > Windows Components > Windows Remote Shell.

- Double-click on the “Allow Remote Shell Access” group policy object, tick the “Enabled” radio button, then click on the “Ok” button.
- Exit the Local Group Policy Editor window.
- Right-click on the Start button, then click on the “Run” menu item. Inside the “Run” box, type “gpedit.msc” without quotes, then press the Enter key. Accept the User Account Control (UAC) prompt as needed for elevation.
- Right-click on the Start button, then click on the “Windows PowerShell (Admin)” menu item to launch an elevated PowerShell session. Accept the User Account Control (UAC) prompt as needed for elevation.
- Inside the elevated PowerShell window, execute the following command to enable PowerShell Remote Management, which may take a moment to complete:
Enable-PSRemoting - Inside the elevated PowerShell window, execute the following command to check the current memory limit value for each PowerShell session:
Get-Item WSMan:\localhost\Plugin\Microsoft.PowerShell\Quotas\MaxMemoryPerShellMB
- Inside the elevated PowerShell window, execute the following command to set a new memory limit value for each PowerShell session:
Set-Item WSMan:\localhost\Plugin\Microsoft.PowerShell\Quotas\MaxMemoryPerShellMB 6144
Note: Given that this is a lab environment, the amount of memory allowed per shell instance has been set to 6144 MB (6 GB). You should adjust this value to reflect the amount of memory you wish to allow per shell instance, which can vary greatly based on server secifications, intended use case, etc. - Inside the elevated PowerShell window, execute the following command to restart the WinRM service:
Restart-Service winrm - Launch an SSH Terminal session to a server with OpenSSL installed and authenticate as needed.
- Change directories to the /tmp parition (or another directory of choice) and create a new directory to work from:
cd \tmpmkdir certcd cert - Execute the command below to generate a new private key, which will be saved to the directory created above:
openssl genrsa -out privkey.key 2048 - Create a new configuration file which will be referenced to build the Certificate Signing Request (CSR):
- Execute the command below to open the vi text editor and stage with the desired file name:
vi csr_config.cfg - The vi text editor will open. Press the “INSERT” key to enter input mode.
- Paste the following lines into the vi text editor:
[ req ]
default_bits = 2048
default_keyfile = privkey.key
distinguished_name = req_distinguished_name
encrypt_key = no
prompt = no
string_mask = nombstr
req_extensions = v3_req

[ v3_req ]
basicConstraints = CA:FALSE
keyUsage = digitalSignature, keyEncipherment, dataEncipherment
extendedKeyUsage = serverAuth, clientAuth
subjectAltName = DNS:scripthostfqdn.local, DNS:scripthost

[ req_distinguished_name ]
countryName = (Country Code)
stateOrProvinceName = (State or Province)
localityName = (Locality)
organizationName = (Organization Name)
organizationalUnitName = (Organizational Unit Name)
commonName = scripthostfqdn.local - Save the file by pressing the “ESC” key, then type “:wq” and press the “Enter” key.
- Execute the command below to generate the CSR:
openssl req -new -key privkey.key -out script_host_csr.csr -config csr_config.cfg - Download the CSR file to your local workstation.
- Execute the command below to open the vi text editor and stage with the desired file name:
- Using a web browser of choice, navigate to the organization’s Certificate Services portal.
- Click on the “Request a Certificate” link.

- Click on the “Submit a certificate request…” link.

- Open the CSR file downloaded in previous steps using a text editor of choice. Copy and paste the entire contents of the file, including the START/END CERTIFICATE REQUEST sections into the “Base-64-Encoded certificate request” text box.

Note: Notice that the screenshot above contains the full contents of the CSR file. This is intentional for the sake of providing clear instruction and was exclusively generated for use in this post. You should never share your CSR nor certificate private key with anyone whom you do not trust. Ensure your CSR and certificate private key are stored in a secure location in accordance with your organization’s policy. - Click on the “Certificate Template” drop-down menu and select the appropriate certificate template menu item, then click on the “Submit” button.

- Once the “Certificate Issued” screen appears, tick the “Base 64 encoded” radio button, then click on the “Download Certificate” link. Save the file to your local workstation and upload a copy to the server with OpenSSL installed.
- Execute the command below to convert the certificate file with a .cer extension to a PKCS #12 (.p12) certificate which includes the private key:
openssl pkcs12 -export -in script_host_cert.cer -inkey privkey.key -name "scripthost" -out script_host_cert.p12 - If prompted to specify an “Export Password”, press the “Enter” key twice to bypass.
Note: It is good practice to specify an export password to partially mitigate the risk of the certificate being imported into an unauthorized server. If you specify a password for the certificate, ensure it is stored securely according to your organization’s policy. - Upload the PKCS #12 (.p12) certificate to the script host.
- Launch a VMware Remote Console (VMRC) or Remote Desktop Protocol (RDP) session to the script host and authenticate as the service account user.
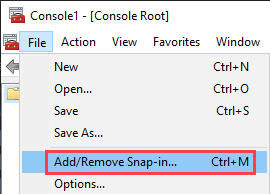
- Right-click on the Start button, then click on the “Run” menu item to launch the “Run” dialog box. Type “mmc” and press the “Enter” key. Accept the User Account Control (UAC) prompt as needed for elevation.
- The Microsoft Management Console (MMC) window will open. Click on the “File” menu item, located at the top-left corner of the window, then click on the “Add/Remove Snap-In” menu item.
- The “Add/Remove Snap-ins” box appears. Click on the “Certificates” menu item from the left-side pane, then click on the “Add” button.

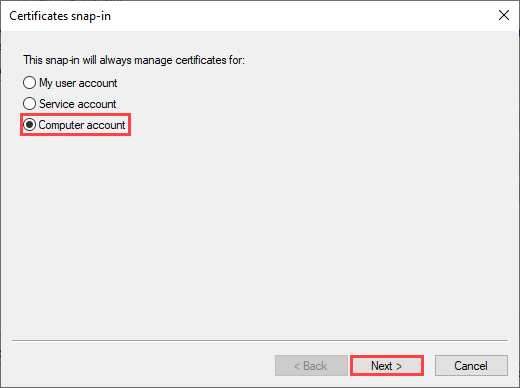
- The “Certificates snap-in” box appears. Tick the “Computer account” radio button, then click on the “Next” button.
- The “Local Computer” radio button should be ticked by default. Click on the “Finish” button, then click on the “OK” button to close the “Add/Remove Snap-Ins” window.

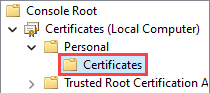
- Click on the chevron (“>”) button and navigate to the following: Console Root > Certificates > Personal. Note that if a “Certificates” item appears beneath the “Personal” object, select that item instead.
- Right-click on the “Personal” object (or “Certificates” object if it appears beneath the “Personal” object), hover your mouse over the “All Tasks” menu item, then click on the “Import” menu item.
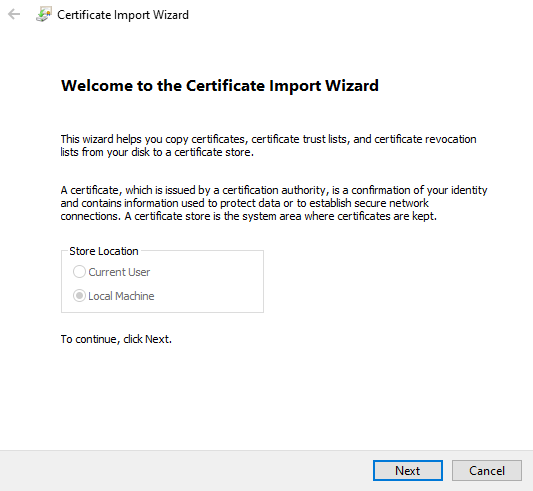
- The Certificate Import Wizard window opens. Click on the “Next” button, then click on the “Browse…” button and select the PKCS #12 (.p12) certificate uploaded in a previous step.
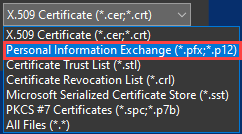
- The file browser window opens. Click on the file extension drop-down menu, located at the bottom-right corner of the page. Click on the “Personal Information Exchange…” menu item, navigate to the location of the certificate (.p12) file uploaded in a previous step, click to select the certificate, then click on the “Open” button. Finally, click on the “Next” button inside the “Certificate Import Wizard” window.
- Although prompted for an import password for the private key, you may skip this field.
- Tick the “Mark this key as exportable” check box, then click on the “Next” button.
- The “Place all certificates in the following store” radio button should be ticked by default, with the “Personal” certificate store selected. Click on the “Next” button, then click on the “Finish” button.
- After a moment, the “Certificate Import Wizard” dialog box should appear, stating “The import was successful”. Click on the “Ok” button to acknowledge.
- Notice that if the “Certificates” object was not present beneath the “Personal” object previously, it has since been created. Click on the “Certificates” object. Notice that the certificate has been imported to this certificate store.
- Double-click on the certificate. Once the “Certificate” box opens, click on the “Details” tab and scroll the attributes pane to the bottom of the list.
- Click on the “Thumbprint” value, which is near the bottom of the list. Copy the full thumbprint to your clipboard, or capture a screenshot for reference later.

- Right-click on the Start button, then click on the “Windows PowerShell (Admin)” menu item to launch an elevated PowerShell session. Accept the User Account Control (UAC) prompt as needed for elevation.
- Type or paste the command below into the elevated PowerShell window, which will store the certificate object inside of a variable. Note that you must replace “%thumbprint%” with the certificate thumbprint captured in a previous step:
$cert = Get-ChildItem -Path Cert:\LocalMachine\My\%thumbprint% - Confirm the thumbprint matches the expected value by executing the command below to reveal the thumbprint stored within the variable. Ensure the value matches the thumbprint of the imported certificate:
$cert - Execute the command below to create a WinRM listener with the imported certificate bound:
New-Item -Path WSMan:\localhost\Listener -Transport HTTPS -Address * -CertificateThumbprint $Cert.Thumbprint -Force - Click on the Start button, then type “cmd” and wait for the search results to populate. Once the “Command Prompt” menu item appears, right-click on it, then select the “Run as Administrator” menu item. Accept the User Account Control (UAC) prompt as needed for elevation.
- Enable Kerberos Authentication for WinRM by executing the command below:
winrm set winrm/config/service/auth @{Kerberos="true"}
Note that Kerberos Authentication may already be enabled for the WinRM Service, which can be validated by executing the command below and reading the output:winrm get winrm/config - Return to the Elevated PowerShell window you opened previously, or open a new session as needed.
- Execute the command below to create a Windows Firewall rule to allow inbound HTTPS traffic to port 5986 over TCP. This step can be omitted if Windows Firewall is fully disabled.
New-NetFirewallRule -Direction Inbound -Action Allow -DisplayName "Windows Remote Management [HTTPS-In]" -Description "Inbound rule for Windows Remote Management via WS-Management. [TCP 5986]" -Program "System" -Profile Domain,Private -Protocol TCP -LocalPort "5986" -RemotePort Any - Launch an SSH terminal session to the Aria Automation Orchestrator appliance.
- Execute the command below to change directories to the location of a specific set of configuration files:
cd /data/vco/usr/lib/vco/app-server/conf/ - Execute the command below to launch the vi text editor and create (or modify if present) a file named “krb5.conf”.
vi krb5.conf - If the file exists and is not empty, compare the contents below and update as needed after pressing the “INSERT” key. If the file did not exist previously or is empty, press the “INSERT” key and paste the contents below:
[libdefaults]
default_realm = MYDOMAIN.LOCAL
[realms]
mydomain.local = {
kdc = ldap.mydomain.local
default_domain = mydomain.local
}
[domain_realm]
.mydomain.local=MYDOMAIN.LOCAL
mydomain.local=MYDOMAIN.LOCAL - Once the file contents have been pasted or modified as needed, press the “ESC” key, then type “:wq” and press the “Enter” key.
- Update the permissions on the “krb5.conf” file by executing the command below:
chmod 644 krb5.conf - Execute the command below to copy the “krb5.conf” file to an additional location on the Orchestrator appliance:
cp krb5.conf /usr/java/jre-vmware/lib/security/krb5.conf - Update the permissions on the newly created “krb5.conf” file by executing the command below:
chmod 644 krb5.conf - Execute the command below to list the Kubernetes container pods hosted by the Orchestrator appliance:
kubectl -n prelude get pods - Locate the pod with a name starting with “vco-app-“. Copy the full name value to your clipboard for future reference.
- Delete the scoped pod by executing the command below. Note that the Pod will automatically be re-deployed within a few minutes once executed. You must replace the “%ID%” placeholder with the characters following “vco-app-“ in your environment:
kubectl -n prelude delete pod vco-app-%ID%
After executing this command, the SSH terminal session may become unresponsive for a few moments while Kubernes processes the request. - Monitor the pod rebuild progress by executing the command below:
watch kubectl -n prelude get pods
Observe as the value in the “READY” column for the “vco-app-*” pod progresses from “0/3” to “3/3”. Wait for the value to reflect “3/3” before proceeding. You may exit this prompt at any time by pressing the “CRTL + C” key combination. - Browse to the Orchestrator Appliance web UI using a web browser of choice and authenticate as needed.
- Click on the “Start Automation Client” link as needed to launch the Orchestrator dashboard.

- Click on the “Workflows” menu item, located beneath the “Library” heading inside the left-side pane.
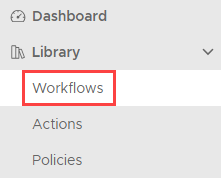
- Click on the “Tree View” icon, located at the top-right corner of the page. This is a preference and is not required if you prefer the card view.

- Click on the chevron (“>”) icon within the directory structure to navigate to: Workflows > Library > PowerShell > Configuration > Add a PowerShell Host

- With the “Add a PowerShell Host” workflow selected, click on the “Run” button, located along the top ribbon. The “Add a PowerShell Host” workflow will now launch.

- Populate the following fields:
- PowerShell Host Tab
- Name: (Specify a friendly name/label for the script host)
- Host/IP: (Specify the FQDN of the script host)
- Port: 5986

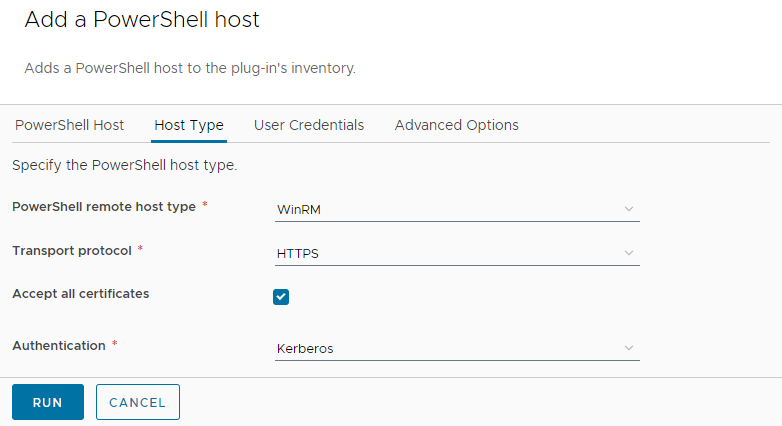
- Host Type Tab
- PowerShell remote host type: WinRM
- Transport Protocol: HTTPS
- Accept all certificates: (ticked)
- Authentication: Kerberos
- User Credentials Tab
- Session Mode: Shared Session
- User Name: (Specify the service account intended to execute scripts on your behalf using
[email protected]format) - Password: (Specify the password of the service account)

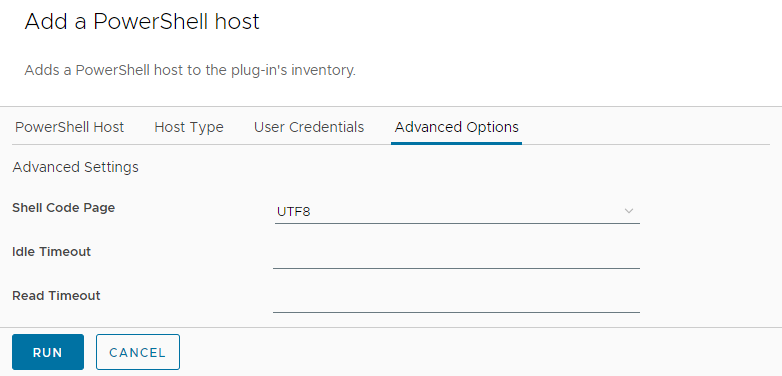
- Advanced Options Tab
- Shell Code Page: UTF8
- Shell Code Page: UTF8
- PowerShell Host Tab
- Once all fields above are populated, click on the “Run” button, located at the bottom-left corner of the page.
- The workflow will now execute. Click on the “Logs” tab to monitor progress.
- Upon success, the status indicator located to the right of the “Add PowerShell host” heading will reflect “Completed”!

After successfully following the steps outlined above, you should now have a fully functional script host capable of secure communication with the Orchestrator appliance via HTTPS and Kerberos authentication. While I acknowledge that this process may have been a lengthy journey, I hope that these detailed instructions have enhanced your understanding of the process. Remember, in the world of automation, persistence and precision often lead to the most rewarding outcomes. Best of luck with your automation endeavors, and may your scripts always run smoothly!