Estimated reading time: 6 minutes

Service Broker, a core component of Aria Automation, strikes a balance between simplicity and visual appeal right out of the box, catering to a wide range of needs. Yet, there are moments when you might want to highlight a specific field or element within a form. Despite the robust features of Service Broker, the customization options for text and field elements — limited to a standard style — can seem restrictive, lacking the flair of bold fonts, underlines, and more. What if you want to call attention to a particular text element or field? Don’t despair – a simple and effective workaround exists! By integrating basic Cascading Style Sheets (CSS) code into your forms, you can unlock a new dimension of customization. VMware embraced this potential in 2020, introducing support for custom CSS with the launch of Aria Automation 8.1 (previously known as vRealize Automation). While CSS has the reputation of complexity in more advanced scenarios, enhancing your forms with a touch of personalization is surprisingly accessible and requires minimal coding effort. Let’s explore how you can transform your forms with a few examples.
Getting Started
First, we need to launch Service Broker and select a Custom Form.
- Using a web browser of choice, launch Aria Automation and navigate to Service Broker as needed.
- Click on the “Content & Policies” tab, located along the top ribbon.

- Click on the “Content” menu item, located within the left-side navigation pane.

- Locate the Cloud Template or Automation Orchestrator Workflow you wish to modify. Keep in mind, you are simply modifying the Custom Request Form – not the Cloud Template or Orchestrator Workflow itself.
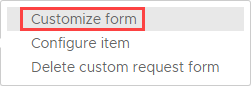
- Once identified, click on the “three vertical dots” icon, to the left of the content name, then click on the “Customize Form” menu item which appears.

Second, we must identify the “Field ID” for each form element we intend to stylize.
- Click on a form element you intend to stylize. In this example, I will select a generic text element which reads “Warning: Capture snapshots before proceeding!”.

- Once selected, notice that the unique “Field ID” is indicated inside the “Properties” pane, located to the right. Make note of this value, as we will reference it very soon.

Finally, we will launch a code editor of choice to create a CSS file.
- Launch a code editor of your choice. I will use Visual Studio Code, although Notepad++ and others will suffice.
- Save the file (despite it being empty) to a memorable location on your device, such as the Desktop. When prompted to save the file, ensure the file type is a Cascading Style Sheets File (.css).
- Now that the file has been created, we will explore some examples and type or paste them into the code editor, save the file, and upload to Service Broker.
- Once you type/paste code into your CSS file, save the changes, then navigate back to the custom form window in Service Broker.
- Click on the “Actions” button, located along the top ribbon, then click on the “Import CSS” button. Select your newly created CSS file and upload via the File Browser window.

- Click on the “Save” button, located at the bottom-left corner of the Custom Form page in Service Broker. Repeat for each update to the CSS file – uploading a new version of the CSS file will overwrite the previous in Service Broker.
Note that the form canvas will not display customizations provided by CSS within the editor. In other words, you must save the form and launch from the catalog (like a user would) to observe the changes. It may be helpful to open the catalog item in a separate tab so you can simply refresh each time the form is updated with a new CSS file and saved.
CSS Examples – Text Elements
Below are a few common and basic scenarios for applying CSS to text elements. Remember that the “Field ID” is a unique value, thus the value in my example will be different from yours: update the Field ID to reflect your environment, otherwise the web browser will not target the field correctly and it will seem as though nothing has happened. In this example, I will target a text element which reads “Warning: Capture snapshots before proceeding!”, and has a Field ID of “text_d4ebf292”.
Set text color to red and bold
/* CSS for my PowerShell Form */
#text_d4ebf292 label{color: #ff0000; font-weight: bold;}
Set text color to red and bold with underline
/* CSS for my PowerShell Form */
#text_d4ebf292 label{color: #ff0000; text-decoration-line: underline; font-weight: bold;}
Set text color to white and bold with a red background
/* CSS for my PowerShell Form */
#text_d4ebf292 label{color: #ffffff; background-color: #ff0000; font-weight: bold;}
Set text color to red and bold with a larger font (14px)
/* CSS for my PowerShell Form */
#text_d4ebf292 label{color: #ff0000; font-weight: bold; font-size: 14px;}
These are just a few basic examples, but the possibilities are tremendous!
You can learn more about CSS formatting for text elements from various online sources, but W3Schools has some great information: https://www.w3schools.com/css/css_text.asp
CSS Examples – Text Fields
Below are a few common and basic scenarios for applying CSS to text fields. Remember that the “Field ID” is a unique value, thus the value in my example will be different from yours: update the Field ID to reflect your environment, otherwise the web browser will not target the field correctly and it will seem as though nothing has happened. In this example, I will target the “Request Number” text field, which has a Field ID of “textField_a3d8e2e4”.
Add a red border with rounded corners around the text field
/* CSS for my PowerShell Form */
#textField_a3d8e2e4 .clr-input {border: 2px solid red;border-radius: 4px;}
Add a yellow background to the text field
/* CSS for my PowerShell Form */
#textField_a3d8e2e4 .clr-input {background-color: #FFE699;}
Add a green background and enforce white text on the text field
/* CSS for my PowerShell Form */
#textField_a3d8e2e4 .clr-input {background-color: #3CBC8D;color: white;}
Just as before, these are only a few basic examples. In most cases, you are only limited by your imagination.
You can learn more about CSS formatting for text inputs/forms from various online sources, but W3Schools has some great information: https://www.w3schools.com/css/css_form.asp
The VMware Docs library also provides some context which you may find useful: https://docs.vmware.com/en/vRealize-Automation/8.11/Using-and-Managing-Service-Broker/GUID-A152CC03-D0DC-41C1-9ADA-A386983CA548.html