Estimated reading time: 7 minutes

Security has become a top priority for every VMware Cloud Foundation (VCF) Administrator, and one of the fundamental best practices for vCenter Server security is replacing the default self-signed machine certificate with a signed SSL certificate.
In the past, this process was a bit obtuse and frustrating. However, VMware by Broadcom has listened to feedback (or answered enough of our support cases) and made significant improvements to the workflow, streamlining the process for Administrators. The result is a much simpler and more efficient procedure for securing vCenter Server.
Despite these improvements, there are still a few key details you need to be aware of. In this article, we will discuss the updated process and highlight important considerations to ensure a smooth SSL certificate implementation.
Prerequisites
- Administrative rights to the scoped vCenter Server(s).
- Access to the Active Directory Certificate Services Portal, with the ability to generate a signed certificate using a provided Certificate Signing Request (CSR). If your Certificate Authority (CA) is hosted by a different platform, ensure you have adequate permissions. This article assumes a Microsoft CA is used.
- Although the steps are similar, this article assumes you are operating vCenter Server 8.0.3.
- The vCenter Server should not be managed by SDDC Manager (VCF Implementations).
Important Considerations
- The scoped vCenter Server will be unavailable briefly when a new SSL certificate is applied, as services must restart. Although there is no impact to virtual machines or Hosts, users and integrated solutions accessing or communicating with vCenter may experience a brief interruption in service.
- All integrated solutions (i.e., NSX, VCF Operations, etc.) must accept the new certificate thumbprint after a certificate is applied to the vCenter Server. This is usually performed by reauthenticating the platform with vCenter Server, for which the steps will vary.
- Document each solution which integrates with vCenter Server and engage colleagues appropriately. There are often more integrated solutions than you think. Consider backups, monitoring, IPAM, disaster recovery, automation, and other solutions in your assessment.
- As usual, you should research and test this process outside of your Production environment first, as this article cannot account for any nuances in your environment.
Pre-Flight Checks
- Confirm access to the resources mentioned in the “Prerequisites” section above.
- Verify that vCenter Server backups are configured and working properly using the vCenter Server Appliance Management Interface (VAMI). Although this article does not cover the process of backing-up your VCSA, you can find more information via KB 318731.
- If you have more than one vCenter Server and configured Enhanced Linked Mode (ELM), it is highly recommended that you capture offline snapshots (meaning in a powered-off state) of all linked vCenter Servers to mitigate risk of Platform Services Controller (PSC) replication issues. This is in addition to the file-based backups mentioned above. More information can be found via KB 313886.
Generate a Certificate Signing Request (CSR)
Using a web browser of choice, authenticate to the scoped vCenter Server using an account with administrative rights.
Click on the “hamburger menu” (icon of three horizontal lines), located at the top-left corner of the window, then click on the “Administration” menu item.
Click on the “Certificate Management” menu item, located within the left-side navigation menu and beneath the “Certificates” heading.
If necessary, click on the “Machine SSL” tab, located beneath the “Certificate Management” heading located at the top of the window.

Tick the radio button located to the left of the certificate you intend to replace or renew.
Click on the “Generate Certificate Signing Request (CSR)” button, located above the table.

The “Generate CSR” window appears, containing multiple input fields. Populate each field per the below:
Common Name: (The FQDN of the vCenter Server)
Organization: (Your organization name)
Organizational Unit: (Your department name)
Country: (Your country)
State/Province: (Your state/province)
Locality: (Your city or similar locality)
Email Address: (Your e-mail address or department distribution list)
Host: (The FQDN of the vCenter Server)
Subject Alternative Name: (The FQDN of the vCenter Server and IP Address, separated by a comma. For example, vcenter.domain.local,192.168.1.2)
Key Size: 2048
Click on the “Next” button.
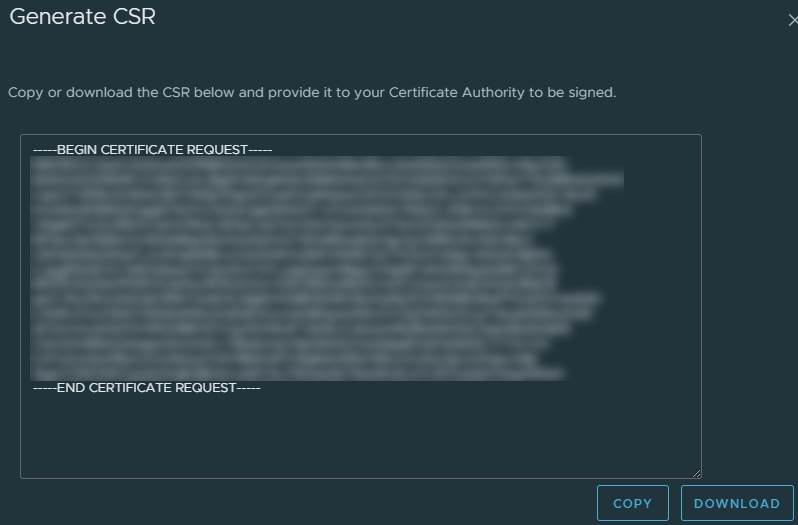
The CSR is displayed with options to copy or download the content. Click on the “Download” button and save to a memorable location on your local workstation, then click on the “Finish” button.
In a new tab or browser window, navigate to the Active Directory Certificate Services portal.
Click on the “Request a certificate” link.

Click on the “Submit a certificate request by using a base-64-encoded CMC or PKCS #10 file, or submit a renewal request by using a base-64-encoded PKCS #7 file” link.

Open the CSR text file saved in previous steps. Copy and paste the entire file contents into the “Base-64-encoded certificate request” text box.
Click on the “Certificate Template” dropdown menu, then click on the certificate template of your choosing.

Click on the “Submit” button.
The “Certificate Issued” page is displayed. Tick the “Base 64 encoded” radio button, then click on the “Download Certificate” link. Save the output file to a memorable location on your local workstation. In this article, we will name the file “vcenter_cert.cer“.

If you have a certificate chain (Root CA certificate with an Intermediate Certificate), copy the certificate chain file to your local workstation. If you do not use an Intermediate CA, simply copy the root CA certificate to your local workstation instead. In this case, I have an Intermediate CA and will therefore name my certificate chain file “cert_root_chain.cer“.
Install the Signed Certificate
Return to the vCenter web browser tab or window, then click on the “Import and Replace Certificate” button, located above the table.

The “Replace vCenter Server Certificate” window appears. Tick the “Replace with external CA certificate where CSR is generated from vCenter Server (private key embedded)” radio button, then click on the “Next” button.

Two boxes will appear within the window: one for the “Machine SSL Certificate” and another for the “Chain of trusted root certificates“.
Click on the “Browse File” button located beneath the “Machine SSL Certificate” text area. Click on the “vcenter_cert.cer” file saved in previous steps, then click on the “Open” button.
Click on the “Browse File” button located beneath the “Chain of trusted root certificates” text area. Click on the “cert_root_chain.cer” file saved in previous steps, then click on the “Open” button.
Confirm that text appears in each of the text boxes, then click on the “Next” button.

Tick the checkbox to confirm that you have captured a backup of the vCenter Server, then click on the “Next” button.
Review the configuration for accuracy, then click on the “Finish” button. Note that multiple vCenter Services will restart as the new certificate is applied.
While applying the certificate, the “Replace in progress” banner will briefly appear.

Upon completion, a confirmation window will appear, prompting you to refresh the web page. Click on the “Refresh” button.

The authentication page will appear, although the web browser may still report that the connection is “Not secure” in the address bar. This is expected due to browser cache.
Chrome/Edge | Firefox |
|---|---|

| 
|
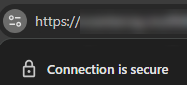
Close all web browser windows and launch a new browser session, then navigate to the vCenter Server address. Notice the address bar now reports that the connection is secure:
Chrome/Edge | Firefox |
|---|---|
| 
|
Authenticate using an account with administrative rights.
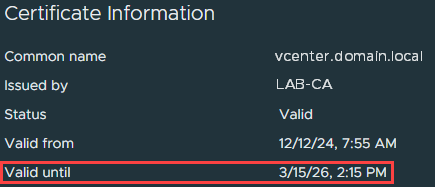
If necessary, navigate back to the “Certificate Management” page. Click on the “double chevron” (>>) button located to the left of the certificate, and review each attribute for accuracy.

Make note of the “Valid until” date and time, as this is when the certificate will expire. Ensure protocols are setup internally to guarantee the certificate is renewed prior to expiration, as this is a manual process.
Wrapping-Up
Now that the vCenter Server certificate has been replaced, you must validate each integrated solution (i.e., VCF Operations, monitoring platforms, etc.) and accept the new certificate thumbprint as needed.
Your Feedback Matters
If you found this article useful, please consider leaving a quick star rating below or leave a comment at the bottom of the page. Comments and suggestions are always appreciated and help guide future content for the virtualization and automation community.